LEGO enthusiasts are always looking for ways to take their creations to the next level. While the standard building blocks offer unlimited possibilities, adding a LEGO light kit can completely transform your models from basic builds into jaw-dropping displays. Whether you're illuminating a city skyline, giving life to a Star Wars spacecraft, or adding atmosphere to a medieval castle, LEGO light kits are the perfect way to enhance both the look and experience of your LEGO sets.
In this guide, we’ll explore why you should add light kits to your LEGO builds, the different types of light kits available, and how to install them for a glowing result.
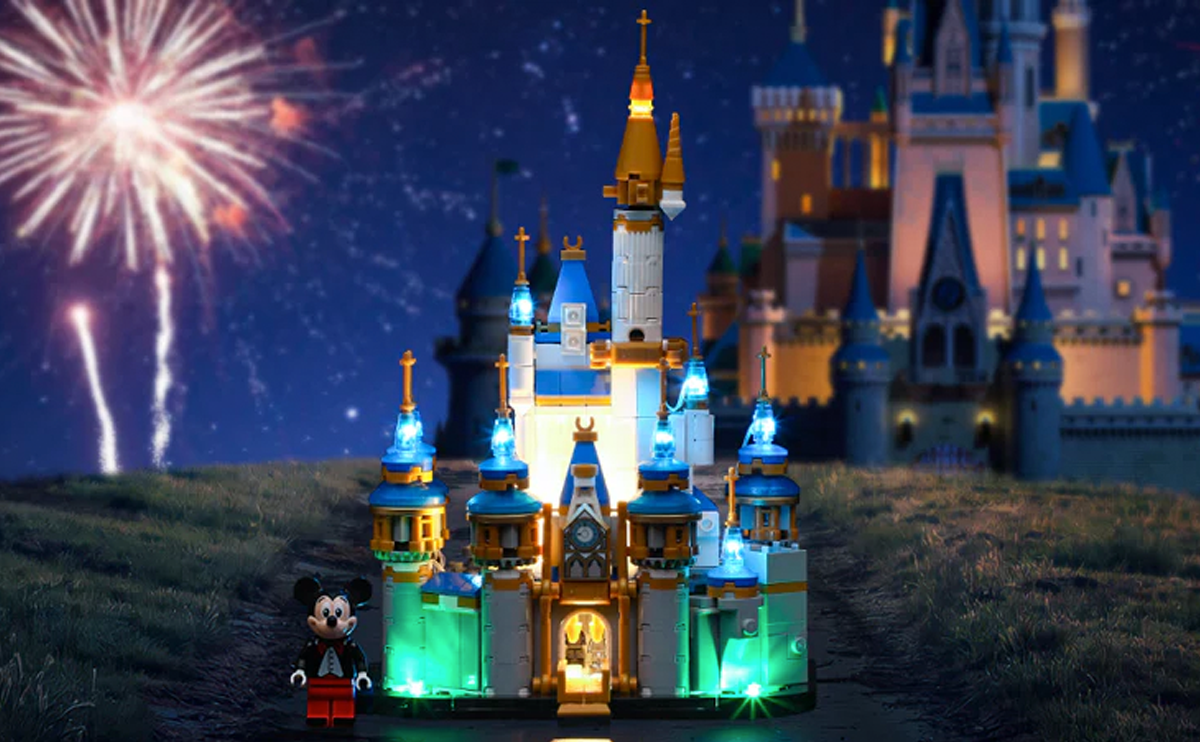
Why Use LEGO Light Kits?
LEGO sets are already a great way to unleash creativity, but light kits can make them even more dynamic and visually appealing. Here are a few reasons why LEGO builders are turning to light kits:
Bring Your Models to Life: Lighting adds an element of realism to your builds. Imagine the flicker of streetlights in a LEGO city or the soft glow of headlights on a LEGO car—these small touches make your creations feel alive.
Transform Your Display: If you display your LEGO sets at home or in an office, light kits are an instant upgrade. They draw attention, create ambiance, and make your sets stand out, especially in low-light conditions.
Highlight Key Features: Lighting can focus attention on specific details of your build, whether it's the cockpit of a Star Wars ship, the windows of a modular building, or the throne room in a LEGO castle.
Create Thematic Atmosphere: Light kits can help match the tone of the set. Soft white lights create a calm, elegant atmosphere, while colorful or flashing lights add action and energy.
Types of LEGO Light Kits
When choosing a light kit, there are several factors to consider, including compatibility, lighting options, and installation difficulty. Here are the main types of light kits you can use to enhance your LEGO sets:
Basic LED Light Kits: These are simple kits that provide essential lighting, often in the form of small LED strips or single lights. They are ideal for beginners and work well with most LEGO sets, from vehicles to buildings.
Themed Light Kits: Some light kits are designed specifically for popular LEGO sets like the Millennium Falcon, Hogwarts Castle, or modular buildings. These kits are tailored to fit perfectly within the design, and they enhance specific features, such as engine thrusters or window lighting.
Remote-Controlled Light Kits: If you want more control over how your LEGO set is illuminated, consider remote-controlled light kits. These allow you to adjust brightness levels, switch between different colors, and even set lighting sequences.
Sound-Activated or Motion-Sensor Kits: For the truly adventurous, sound-activated or motion-sensor light kits respond to external triggers, adding an extra layer of interactivity. Imagine your LEGO build lighting up as soon as someone enters the room or claps their hands!
How to Install LEGO Light Kits: Step-by-Step Guide
While adding light kits may seem intimidating at first, the process is often straightforward, and most kits come with detailed instructions. Here’s a general step-by-step guide on how to install light kits in your LEGO creations:
Step 1: Plan Your Layout
Before you start installing, take a moment to plan where you want to place your lights. Look for key areas that will benefit from illumination, such as:
- Interior rooms in buildings
- Windows or doorways
- Cockpits or engines in vehicles
- Any other focal points or important features
Also, consider how you will route the wires so they remain hidden and don’t interfere with the aesthetics or playability of your set.
Step 2: Open Up the Build (If Necessary)
If you're installing a light kit on an already assembled LEGO set, you may need to disassemble certain parts to run the wiring. Be careful when taking apart sections, especially intricate builds, and keep the instructions handy to ensure you can easily reassemble the parts.
Step 3: Install the Lights
Carefully place the lights according to your plan. Here are a few tips to ensure a smooth installation:
- Use tweezers or small tools: LEGO builds can have tight spaces, and you’ll often need to thread wires through small gaps. Tweezers can help you place lights and wires precisely.
- Secure the wires: Some light kits come with clips or tape to secure the wiring in place. Make sure the wires are snug against the build to avoid loose, dangling wires that might detract from the clean look of your model.
- Test as you go: Before finalizing your build, test the lights after placing them to make sure everything works as expected.
Step 4: Power the Lights
Once everything is installed, it’s time to power your lights. Most LEGO light kits come with a USB power source, but some may also include battery packs or plug into wall sockets. Ensure the power source is hidden or tucked away to keep the display looking clean.
Step 5: Reassemble and Enjoy the Glow!
After the lights are in place and working, carefully reassemble any parts of the set that were disassembled. Turn off the main lights in the room, and admire your creation in all its illuminated glory!
Best LEGO Sets for Light Kit Enhancements
Here are some of the top LEGO sets that pair perfectly with light kits, taking your build from impressive to awe-inspiring:
LEGO Star Wars Millennium Falcon: One of the most iconic LEGO sets, adding lights to the cockpit, engines, and interior gives this model an intergalactic glow.
LEGO Harry Potter Hogwarts Castle: Illuminate the castle windows, turrets, and interior rooms for a magical touch that transports your set to the wizarding world.
LEGO Creator Expert Modular Buildings: Light kits work beautifully in modular buildings like the Bookshop or Police Station, giving them the look of a bustling city at night.
LEGO Technic Supercars: Add lights to the headlights and interior of Technic cars like the Porsche 911 or Bugatti Chiron for a sleek, high-performance appearance.
LEGO City Sets: City skylines, trains, and street scenes all come to life with well-placed lighting, turning a simple build into a lively diorama.
Tips for Maintaining Your LEGO Light Kits
To ensure your lights last as long as possible and continue to shine bright, here are a few maintenance tips:
Handle Wires with Care: The wires in light kits can be thin and delicate. Avoid pulling or bending them too much, as this can cause wear or breakage over time.
Keep Dust at Bay: Dust can accumulate on both LEGO bricks and the lights. Gently dust your sets regularly to maintain their appearance and the brightness of the lights.
Replace Batteries or Check Power Sources: If the lights start to dim, check the power source. Replace batteries as needed, or ensure the USB cable is securely plugged in.
Ready to Light Up Your Next Build?
Adding light kits to your LEGO sets opens up a whole new world of creativity and display potential. From cityscapes to spaceships, the possibilities are endless when you combine the brilliance of LEGO with the magic of lighting. Browse our collection of LEGO-compatible light kits today and get started on illuminating your builds!
Check out our selection of LEGO light kits to find the perfect one for your next build. Whether you’re working on a city street or an intergalactic spaceship, we have a light kit that will make your creation shine!
Also, don't hesitate to check our other Lego article.