If you’ve been roaming the chaotic battlefields of Plants vs Zombies Garden Warfare 2, you’ve probably encountered the hulking orange tank known as Iron Citron. This heavyweight variant of the standard Citron class brings a completely different playstyle to the table, trading mobility for raw defensive power and devastating close-range damage. Whether you’re a newcomer curious about unlocking this armored beast or a veteran looking to optimize your loadout, this comprehensive guide will cover everything you need to dominate as Iron Citron.
I’ve spent countless hours mastering this character across multiple game modes, and I’m genuinely excited to share what makes Iron Citron such a unique and rewarding choice. From his stat breakdown to advanced positioning strategies, we’ll dive deep into what separates good Iron Citron players from great ones. Let’s get started with understanding what makes this character tick at a fundamental level.
Understanding Iron Citron’s Core Identity
Iron Citron represents a fascinating design choice in the Citron variant lineup. While his citrus cousins focus on mobility and ranged harassment, Iron Citron commits fully to being a frontline brawler who can absorb incredible amounts of punishment. This isn’t a character you play from the backlines, picking off weak targets with precision shots. Instead, Iron Citron thrives in the absolute chaos of contested objectives, where his massive health pool and area-denial capabilities turn him into an immovable object that zombies must deal with or die trying to ignore.
The first time I really understood Iron Citron’s potential was during a heated match on Great White North. Our team was struggling to capture the final garden, with zombies constantly pushing us back with their superior numbers. I switched to Iron Citron, planted myself directly on the objective, and suddenly the entire dynamic changed. Zombies couldn’t ignore me because my damage output at close range was too threatening, but they also couldn’t quickly eliminate me because of my defensive stats. That single character switch turned the tide of the match, and I’ve been hooked on this playstyle ever since.
What really sets Iron Citron apart is his weapon mechanics. Unlike the standard Citron’s rapid-fire energy blasts, Iron Citron fires slower, chunkier projectiles that deal significantly more damage per shot but require more careful aim and positioning. This creates a skill ceiling that rewards players who understand spacing, prediction, and when to commit to fights versus when to retreat. The satisfaction of landing those heavy shots and watching zombie health bars evaporate is genuinely addictive, and it’s what keeps me coming back to this character even after hundreds of matches.
Why Choose Iron Citron Over Other Variants
When you’re standing in the character selection screen, you might wonder why you should pick Iron Citron over the standard Citron or other variants like Toxic Citron or Frozen Citron. The answer comes down to role specialization and what your team needs. If your team lacks a durable frontline presence who can hold objectives under heavy fire, Iron Citron is arguably the best choice in the entire plant roster. His combination of health, damage output, and crowd control makes him uniquely suited for the anchor role.
Standard Citron offers more mobility and consistent damage at range, making him better for players who prefer a more flexible hit-and-run playstyle. Toxic Citron excels at dealing damage over time to clustered enemies, while Frozen Citron provides excellent crowd control through slowing effects. But none of these variants can match Iron Citron’s ability to physically occupy space and force zombies to deal with his presence. When the objective is being swarmed and you need someone who can stand in the chaos and survive, Iron Citron is your answer.
I’ve found that Iron Citron becomes increasingly valuable as you climb in skill brackets and face more coordinated zombie teams. Inexperienced zombie players often ignore objectives to chase kills, but skilled teams understand the importance of controlling space and will relentlessly pressure objectives. Iron Citron punishes these coordinated pushes by making every inch of objective space incredibly costly to contest. The zombie team might eventually kill you, but the time and resources they invested in doing so often allows your team to gain advantages elsewhere on the map.
The Tank Playstyle Philosophy
Playing Iron Citron effectively requires adopting a tank mentality that differs significantly from damage-dealer or support roles. Your job isn’t to have the highest kill count or deal the most total damage. Your job is to control the most important space on the map and force enemies to make difficult decisions. Do they try to kill you, investing significant time and abilities into burning through your health pool? Or do they try to work around you, ceding valuable space and allowing you to dictate the pace of engagements?
This philosophy means you need to be comfortable being the primary target for enemy attacks. You will take damage constantly. You will be focused by multiple zombies. You will spend significant portions of matches at medium to low health while holding critical positions. This can feel uncomfortable initially, especially if you’re coming from squishier characters where taking damage means immediate death. But Iron Citron’s massive health pool means taking damage is expected and acceptable as long as you’re accomplishing your objective of controlling space.
The mental shift required is understanding that staying alive on the objective has value even when you’re not actively getting kills. If you’re sitting on a garden in Garden & Graveyards mode and preventing capture for sixty seconds while taking fire from three zombies, you’ve created enormous value for your team. Those three zombies aren’t pushing other objectives, aren’t killing your teammates, and aren’t setting up teleporters or other infrastructure. Your mere presence shaped their entire strategy, and that’s what great tank play looks like.
Iron Citron’s Base Stats Breakdown
Understanding the numbers behind Iron Citron is crucial for playing him effectively. His stat distribution reveals exactly what kind of character the developers intended him to be, and knowing these values helps inform every decision you make in combat. Let’s break down the key statistics that define Iron Citron’s performance on the battlefield.
Health and Survivability Stats
Health: Iron Citron boasts a massive 200 HP, which is tied for the highest base health among all Citron variants and matches the standard Citron. This enormous health pool is your primary defensive asset and what allows you to contest objectives that would be suicide for squishier characters. However, unlike some other 200 HP characters, Iron Citron lacks innate health regeneration abilities, so managing this resource through strategic positioning and knowing when to retreat becomes absolutely essential.
You can’t just face-tank everything and expect to survive, you need to use cover intelligently while still maintaining offensive pressure. I’ve learned through painful experience that 200 HP disappears faster than you’d think when three or four zombies focus fire you simultaneously. The key is understanding that your health is a resource to be spent strategically rather than a shield that makes you invincible. Every point of health you trade should be exchanged for objective time, enemy cooldowns, or positional advantage.
The lack of special health regeneration mechanics means you’re relying entirely on the standard regeneration system that all characters use. After not taking damage for several seconds, your health begins regenerating automatically. This regeneration delay means you need to fully commit to taking cover when you retreat, actually waiting behind solid objects for the full duration rather than peeking repeatedly and resetting your regeneration timer. Discipline in managing this regeneration cycle separates players who maintain healthy uptime from those who constantly operate at dangerously low health.
Primary Weapon Damage Output
Primary Weapon Damage: This is where things get interesting. Iron Citron’s primary weapon fires projectiles that deal 13 damage for body shots and 21 damage for critical hits. These values might not seem extraordinary at first glance, but remember that Iron Citron fires significantly slower than standard Citron variants. What makes these numbers deceptive is the splash damage component, each projectile creates a small area-of-effect explosion on impact that deals additional damage to nearby targets.
This splash damage typically adds 4-8 damage depending on proximity to the explosion center, meaning your effective damage output can reach 25-29 damage per shot when you’re hitting multiple targets or catching enemies in the full blast radius. Against clustered zombies on objectives, this splash damage can effectively double your DPS compared to fighting isolated targets. I’ve had matches where I was consistently hitting 25+ damage per shot simply by aiming at the center of zombie groups rather than isolating individuals.
The critical hit multiplier is substantial, increasing damage from 13 to 21 for a 61% damage increase. However, landing consistent headshots with Iron Citron’s projectile-based weapon is significantly harder than with hitscan weapons. You need to predict both horizontal movement and vertical head positioning, accounting for projectile travel time and drop. Most of your damage will come from body shots with occasional crits when targets are stationary or moving predictably. I aim for body mass in most situations and only deliberately go for headshots when I have clean stationary targets.
Fire Rate and Ammunition
Rate of Fire: Iron Citron fires at approximately 60 rounds per minute, which translates to one shot per second when firing at maximum speed. This is substantially slower than the standard Citron’s 120 RPM, meaning you absolutely cannot afford to miss your shots. Every whiffed projectile represents a full second of lost damage potential, which can easily be the difference between securing a kill and getting eliminated yourself.
This slower fire rate also means Iron Citron is particularly vulnerable to fast-moving targets like Imps or speedy Scientist variants who can dodge between your shots if you’re not predicting their movement patterns. I’ve found that success with Iron Citron requires developing strong predictive aim rather than reactive tracking. You need to shoot where enemies will be, not where they are, and this skill only develops through consistent practice and experience.
Magazine Size: You get 20 rounds per magazine, which might seem generous, but given Iron Citron’s slower reload speed and the need to land multiple shots to secure kills, you’ll find yourself reloading more often than you’d like. Managing your ammunition becomes a critical skill, especially in extended firefights where you’re engaging multiple targets. Most zombie classes require 3-5 body shots to kill depending on their health pool, meaning you can eliminate 4-6 zombies per magazine if you’re landing shots efficiently.
I’ve lost count of how many times I’ve been forced to retreat or died because I engaged an enemy with only 5 rounds left in my magazine and couldn’t finish them before needing to reload. Developing awareness of your current ammo count and making smart decisions about when to reload versus when to continue fighting is essential. Sometimes it’s better to retreat with 8 rounds remaining and reload safely than to commit to a fight and run dry at the critical moment.
Movement and Mobility Stats
Movement Speed: Here’s where Iron Citron pays the price for his defensive stats. His movement speed is noticeably slower than standard Citron variants, making him feel genuinely sluggish when traversing the map. You move at approximately 85% of standard Citron speed when in assault mode, and this reduced mobility makes you more vulnerable to flanking maneuvers and limits your ability to escape bad situations.
You can’t rely on simply running away from danger like other characters can, you need to position yourself carefully before fights begin because repositioning mid-combat is genuinely difficult. This movement penalty affects everything from how you approach objectives to how you respond to threats to how you escape when things go wrong. I’ve adapted my playstyle to account for this slowness by arriving at positions earlier, committing to holds longer, and using ball form proactively rather than reactively.
Ball Form Speed: When transformed into Citron Ball form, Iron Citron moves significantly faster than his walking speed but slower than other Citron variants in ball form. This creates an interesting dynamic where ball form is useful for traversing the map between objectives but isn’t reliable as a panic escape button during combat. If you try to ball form and roll away in the middle of a firefight, faster zombies can often keep pace with you and continue dealing damage.
Ball form is best used proactively for rotations rather than reactively for escapes. When I need to move between objectives or return from spawn, I stay in ball form for the entire journey. When I’m in combat, I only transform to ball form when I’ve already created separation and broken line of sight, not when I’m actively taking fire. Using ball form reactively in close-quarters combat usually just delays your death rather than preventing it.
Reload Speed Analysis
Reload Speed: Iron Citron’s reload takes approximately 2.5 seconds, which feels like an eternity when you’re in the middle of combat. This lengthy reload animation is one of your biggest vulnerabilities and needs to be timed carefully. Never reload out in the open if you can help it, always try to duck behind cover or retreat around a corner before starting that reload.
Advanced players learn to count their shots and anticipate when they’ll need to reload, positioning themselves safely before that critical moment arrives. If I know I have 5 shots left and I’m about to engage a full-health All-Star who will require at least 6 shots to kill, I reload before engaging rather than committing to a fight I know I’ll lose due to ammunition constraints. This proactive reload timing prevents countless deaths and keeps you effective in extended engagements.
The reload animation cannot be cancelled once started (except by transforming to ball form, which also doesn’t complete the reload), so every reload represents a 2.5-second window of complete vulnerability. Skilled zombie players learn to recognize when you’re reloading and will aggressively push during this window. I’ve been killed countless times by Scientists who waited for my reload animation, warped in during that window, and eliminated me before I could defend myself. Managing reload timing isn’t just about efficiency, it’s about survival.
Primary Weapon Mechanics Deep Dive
The Iron Citron’s primary weapon deserves special attention because mastering its unique mechanics is absolutely essential for success with this character. Unlike hitscan weapons that instantly connect when you click, or simple projectile weapons with straightforward trajectories, Iron Citron fires explosive projectiles with distinct behavior patterns that require practice to fully understand and exploit.
Projectile Trajectory and Travel Time
Each projectile travels in a moderate arc with noticeable projectile drop over distance, similar to firing a slow-moving grenade launcher. This means you need to aim slightly above your target when engaging at medium to long range, compensating for gravity’s effect on the projectile. The arc becomes more pronounced the further your target is, making long-range engagements genuinely challenging and often inefficient.
I generally consider anything beyond 20 meters to be outside Iron Citron’s effective combat range, as the combination of projectile travel time, drop, and spread makes consistent hits unreliable. When I find myself engaging at these distances, I’m usually wasting ammunition and exposing myself to return fire from zombies who are more effective at that range. Better to use ball form to close the gap or reposition to areas where engagements naturally occur at favorable distances.
Projectile travel time is approximately 0.4-0.5 seconds to reach targets at medium range, which means you need to lead moving targets by a significant margin. Against zombies running perpendicular to your position, you might need to aim a full character-width ahead of them to land your shot. This becomes even more complex when engaging jumping targets or enemies using vertical mobility abilities, as you need to predict not just their horizontal movement but also their vertical position when your projectile arrives.
I practice projectile leading by focusing on zombies moving at consistent speeds and directions, learning the muscle memory for how far to lead at various distances. Once you internalize these lead distances, they become automatic reactions rather than conscious calculations. The difference between a player who hits 40% of their shots at medium range versus 70% is almost entirely this predictive aim skill, and it only develops through deliberate practice and attention.
Splash Damage Mechanics
The splash damage radius is approximately 2-3 meters from the point of impact, which sounds small but becomes significant in practice. When zombies cluster together on objectives or bunch up in doorways, a well-placed shot can damage multiple targets simultaneously, dramatically increasing your effective DPS. I’ve had matches where my damage output nearly doubled simply by focusing on shooting into groups rather than isolating single targets.
This splash mechanic also allows you to damage enemies who are partially behind cover, as you can shoot the ground or wall near them and catch them in the explosion radius. This is particularly effective against zombies peeking from behind barriers, as they often feel safe when only a small portion of their body is exposed. By shooting the surface they’re using for cover rather than their body directly, you can damage them without having a direct line of sight to their hitbox.
The splash damage scales based on proximity to the explosion center, dealing maximum damage at the exact impact point and reducing damage as distance from the center increases. This means precision still matters even though you have area-of-effect damage. Landing direct hits deals significantly more total damage than near misses, even though both produce splash damage. I aim for direct impacts whenever possible and treat splash damage as a bonus rather than relying on it as my primary damage source.
Understanding splash damage also informs target prioritization in group fights. When facing three zombies clustered together versus one isolated zombie, I almost always shoot the group first. The splash damage means I’m damaging all three simultaneously, effectively tripling my DPS and creating pressure that forces the group to disperse or commit to fighting me while taking cumulative damage. This area denial through splash damage is part of what makes Iron Citron such an effective objective holder.
Spread Patterns and Accuracy
The weapon has a subtle spread pattern that increases the longer you hold down the fire button, similar to how some automatic weapons work in other shooters. Your first shot is perfectly accurate to your crosshair, but consecutive shots will drift slightly around your aim point. This spread isn’t extreme, but it becomes noticeable at medium range and makes sustained firing at distant targets even less effective.
Smart players use short, controlled bursts rather than holding down the trigger, allowing the spread to reset between shots for maximum accuracy. In close-range brawls where precision matters less, you can safely hold down fire, but for medium-range engagements, that disciplined trigger control makes a measurable difference. I’ve trained myself to tap fire at medium range and only hold down at close range where the spread doesn’t meaningfully impact my hit rate.
The spread pattern seems to favor horizontal drift over vertical, meaning consecutive shots spread left and right more than up and down. This might be intentional to account for the natural vertical drop the projectiles experience. Understanding this horizontal spread helps you compensate, and some players deliberately aim slightly to one side knowing their sustained fire will drift back toward center.
Advanced Projectile Techniques
One mechanic that took me dozens of hours to truly master is projectile inheritance. When you fire while moving in ball form and immediately transform into assault mode, your projectiles inherit some of your momentum, causing them to travel slightly faster and further than stationary shots. Advanced players exploit this by rolling toward enemies, firing mid-roll, and transforming to shoot again, creating a burst damage pattern that can catch zombies off guard.
This technique requires precise timing but can significantly improve your offensive pressure when pushing contested objectives. The momentum inheritance isn’t dramatic enough to completely change engagement ranges, but it does provide a small velocity bonus that reduces travel time and makes your shots slightly harder to dodge. I use this technique when aggressively pushing onto objectives, rolling in while firing to close distance while maintaining damage output.
Another advanced concept is predictive splash placement. Rather than aiming directly at moving targets, you can shoot the ground where they’re running, creating splash damage zones they’ll move into. This is particularly effective in corridors or on objectives where zombie movement is predictable and constrained. By shooting slightly ahead of their path rather than at them directly, you’re guaranteed splash damage even if you miss the direct hit.
The EMPeach Ability Explained
EMPeach is Iron Citron’s crowd control ability and one of the most powerful utility tools in his kit when used correctly. This ability launches a robotic peach that stuns all zombies within its radius, temporarily disabling their abilities and preventing them from moving or attacking. Understanding when and how to deploy EMPeach separates players who occasionally get value from it from those who consistently turn fights with clutch stuns.
EMPeach Basic Mechanics
The stun duration lasts approximately 3 seconds, which might not sound like much, but in the context of Garden Warfare 2’s fast-paced combat, three seconds is an eternity. That’s enough time to land 2-3 primary weapon shots on a stunned target, often securing kills on medium-health zombies before they can react. Against high-priority targets like All-Star or Super Brainz who are diving your backline, a well-timed EMPeach can completely shut down their assault and allow your team to collapse on them for an easy elimination.
The stun radius extends approximately 6-8 meters from the EMPeach’s position, making it effective for controlling small areas or clustered groups. The radius isn’t massive, so you can’t just throw EMPeach randomly and expect to catch enemies reliably. You need to predict where zombies will be or wait until they’ve committed to an engage before deploying it.
I find the most success using EMPeach on contested objectives where zombies naturally cluster, or in tight corridors where they can’t easily spread out to avoid the effect. The objective-focused nature of most game modes means zombies will repeatedly bunch up on capture points, creating consistent opportunities for multi-target stuns. Learning the common clustering locations on each map helps you anticipate where EMPeach will catch multiple targets.
Cooldown time for EMPeach is approximately 15 seconds, which is relatively short compared to many ultimate abilities but long enough that you need to use it thoughtfully. Wasting EMPeach on a single low-priority target means you won’t have it available when the enemy team commits multiple zombies to a coordinated push. I try to reserve EMPeach for situations where I can stun at least two zombies simultaneously, or when I absolutely need to shut down a high-value target who’s threatening to wipe my team.
Offensive EMPeach Usage
When used offensively, EMPeach functions as a setup tool for securing kills or enabling aggressive pushes. Stunning a full-health zombie gives you free damage that they can’t respond to, effectively starting every engagement with a health advantage. Against zombies who rely on mobility or defensive cooldowns to survive, EMPeach completely negates those defensive tools and forces them to eat your damage.
I use offensive EMPeach when I’m pushing onto objectives and encounter defensive zombies. Stunning the defenders before they can retreat or use their abilities allows me to establish presence on the objective before they can respond effectively. This aggressive EMPeach usage is particularly effective when coordinating with teammates, as the stun duration gives your entire team a window to unload damage into helpless targets.
Against ability-dependent zombies like Scientists who rely on warp for mobility or Engineers building deployables, offensive EMPeach creates windows where these zombies are completely vulnerable. A stunned Scientist can’t warp away from danger. A stunned Engineer can’t finish deploying their teleporter. Using EMPeach to interrupt these crucial actions provides value beyond just the damage window, you’re denying strategic advantages that could impact the entire match.
Defensive EMPeach Usage
One advanced technique involves using EMPeach defensively rather than offensively. When you’re being chased by multiple zombies and need to escape, deploying EMPeach behind you as you retreat can freeze your pursuers and give you the few seconds needed to reach safety or allies. This defensive usage is particularly valuable when you’re low on health and would die if the chase continues, as trading your cooldown to preserve your life is almost always worthwhile.
I’ve saved myself countless times by EMPeaching aggressive zombies who overcommitted to killing me, stunning them just long enough to round a corner, transform to ball form, and escape to safety. The stun gives you enough time to create separation that pursuing zombies can’t close even after it expires, effectively ending the chase. This defensive discipline keeps you alive in situations where greedily trying to trade kills would result in your death.
Peel usage for teammates is another defensive application that many players overlook. When you see a zombie diving your Sunflower or other vulnerable teammate, EMPeaching that threat can save your support player and maintain your team’s sustain. A living Sunflower provides ongoing value throughout the match, making the cooldown trade worthwhile even if you don’t secure a kill from the stun.
Interrupt Applications
The ability also functions as an interrupt for channeled zombie abilities. If you catch an Engineer building a teleporter, a Scientist using Heal Station, or a Chomper attempting to burrow, EMPeach will interrupt these actions and force them to restart. This makes it incredibly valuable for disrupting zombie strategies and buying your team time to respond to threats.
I’ve won countless matches by stunning Engineers who were trying to set up crucial teleporters, forcing them to waste time redeploying instead of establishing forward spawns for their team. Teleporter denial is one of the most impactful things you can do in Garden & Graveyards mode, and EMPeach gives you a reliable tool for shutting down teleporter attempts. Watch for Engineers trying to deploy in hidden or protected locations and stun them before they can complete the setup.
One subtle interaction that many players don’t realize: EMPeach affects zombies in the air as well as on the ground. If you stun a zombie while they’re mid-jump or using a movement ability, they’ll freeze in their current position before falling to the ground. This can create hilarious situations where you freeze a jumping Super Brainz mid-leap, but more practically, it means you can shut down aerial threats like Imp in his mech or Scientists using Warp abilities to escape.
EMPeach Timing and Prediction
Predictive EMPeach placement requires understanding zombie movement patterns and anticipating where they’ll be when the ability activates. There’s a brief delay between deploying EMPeach and the stun activating, meaning you need to lead moving targets just like you would with your primary weapon. Throwing EMPeach directly at fast-moving zombies often results in them running out of the radius before the stun triggers.
I aim slightly ahead of zombie movement paths, particularly in corridors or on objectives where their movement options are limited. By placing EMPeach where they’re going rather than where they are, you account for both their movement and the activation delay. This predictive placement takes practice but dramatically improves your stun consistency.
Against zombies with mobility abilities, timing EMPeach to catch them mid-animation can be incredibly effective. Scientists using warp, All-Stars using Sprint Tackle, and Super Brainz using various mobility moves all have brief windows where they’re committed to an action and can’t avoid your stun. Learning to recognize these animation windows and deploying EMPeach at the right moment catches zombies in vulnerable states they can’t escape from.

Citron Ball and Its Strategic Applications
Citron Ball is Iron Citron’s signature mobility ability, transforming him into a rolling sphere that moves significantly faster than his walking speed. While this might seem like a simple movement tool at first glance, mastering ball form usage is absolutely critical for overcoming Iron Citron’s natural sluggishness and positioning yourself effectively across the battlefield.
Ball Form Transformation Mechanics
The transformation takes approximately 0.5 seconds to complete, during which you’re vulnerable and cannot attack or use other abilities. This brief window means you can’t use ball form as an instant panic button when you’re already taking damage, you need to anticipate threats and transform proactively before you’re in immediate danger. I’ve died countless times trying to transform while under fire, only to get eliminated during that half-second animation.
Good players transform preemptively when they sense danger approaching or when they’ve achieved their objective in the current position and need to rotate. If I’m holding an objective and notice multiple zombies approaching from different angles, I’ll transform to ball form before they have line of sight, allowing me to escape before they can focus fire. Waiting until you’re actually taking damage to transform usually means you’ll die during the transformation animation.
The transformation also has a brief animation lock where you cannot change direction or jump, making you predictable for a split second. Skilled zombie players will fire at your transformation position knowing you can’t dodge immediately. To counter this, I try to transform behind cover or around corners where zombies don’t have clean shots at me during that vulnerable moment.
Ball Shield Functionality
In ball form, you gain access to Ball Shield, a damage reduction ability that significantly decreases incoming damage while active. This shield doesn’t make you invulnerable, but it does allow you to roll through moderately contested areas or absorb chip damage while retreating. The shield has its own health pool that depletes as you take damage, and once broken, you’re fully vulnerable again.
Smart players activate the shield before rolling through dangerous areas rather than waiting until they’re already taking significant damage. If I need to roll through a chokepoint being watched by multiple zombies, I activate shield preemptively and accept that I’ll take some damage rather than trying to avoid all damage and potentially getting caught without shield when I need it most.
The shield has approximately 100 effective HP before breaking, meaning it can absorb a decent amount of punishment but won’t save you from concentrated fire. Against a single zombie, the shield usually lasts your entire ball form duration. Against three or four zombies focus firing you, the shield breaks in seconds. Understanding these limits helps you make smart decisions about when rolling away is viable versus when you need to fight or find a different escape route.
Movement Speed and Rotation
The movement speed bonus in ball form is substantial, allowing you to traverse the map much faster than your sluggish walking pace permits. This makes ball form essential for rotating between objectives, returning from spawns, or repositioning during combat. However, because Iron Citron’s ball form is slower than standard Citron variants, you need to start your rotations earlier and can’t rely on ball form to rapidly respond to threats across the map.
If an objective on the opposite side of the map is being captured, you might not reach it in time even at full rolling speed, so map awareness and positioning become even more critical. I’ve learned to predict which objectives will be contested next and start rotating before they’re actually under attack, arriving just as the fight begins rather than showing up after it’s already lost.
Ball form allows you to maintain momentum while going up or down slopes, actually allowing you to build speed on downhill sections. Some maps have specific routes where you can chain downhill sections together to move faster than normal ball form speed. Learning these optimal rotation routes on each map saves precious seconds that can mean the difference between saving an objective and losing it.
Combat Applications of Ball Form
One advanced technique involves using ball form to knock back zombies who get in your path. When you collide with an enemy while rolling, you’ll push them back slightly and deal a small amount of damage. While this isn’t a primary damage source, it can disrupt zombie positioning and occasionally push them off ledges or into environmental hazards.
I’ve scored hilarious eliminations by rolling into zombies near cliff edges on maps like Seeds of Time and sending them tumbling to their deaths. Beyond the comedy value, this knockback can also interrupt channeled abilities or briefly disorient enemies during teamfights. A zombie who’s been knocked back needs to reorient themselves and reacquire their target, buying you or your teammates brief windows to capitalize on.
The roll attack allows you to damage enemies while in ball form by simply colliding with them, dealing approximately 10 damage per hit. While this damage isn’t spectacular, it can help finish off weak targets who are trying to escape or add chip damage during chaotic brawls. Some players underestimate ball form damage and focus entirely on escaping or repositioning, but aggressive players can actually secure kills by rolling into low-health zombies and bouncing repeatedly against them until they die.
I’ve finished countless low-health zombies by rolling at them rather than transforming and shooting, particularly when they’re trying to escape and my projectile travel time would allow them to reach safety. The instant collision damage from ball form often secures kills that would escape if you tried to shoot them. It’s a minor optimization but one that adds up over dozens of matches.
Defensive Mobility Usage
Ball form provides temporary damage mitigation that makes you harder to kill during rotations. Even without activating the ball shield ability, being in ball form reduces your hitbox size and makes you a more difficult target for zombies to hit consistently. Snipers have particular trouble tracking fast-moving balls, and explosive attacks often miss entirely as you roll past their detonation radius.
This inherent defensive value means staying in ball form while moving between positions is almost always better than walking, even if you’re not specifically using it to escape danger. When returning from spawn or rotating between objectives, I remain in ball form for the entire journey unless I need to shoot something along the way. The combination of faster movement and harder-to-hit profile makes ball form the default travel state.
However, ball form has limited combat effectiveness compared to assault mode, so you need to transform back as soon as you reach your destination. I see too many players roll onto objectives and stay in ball form, dealing minimal collision damage when they could be in assault mode dealing proper damage with their primary weapon. Ball form is for getting places, assault mode is for fighting once you’re there.
Upgrade Options and Optimal Builds
The customization system in Garden Warfare 2 allows you to equip various upgrades that modify Iron Citron’s stats and capabilities. Choosing the right combination of upgrades can significantly enhance your effectiveness, but it requires understanding what stats benefit Iron Citron most and what tradeoffs you’re willing to accept. Let’s explore the most impactful upgrade options and discuss the builds that work best in different scenarios.
Health and Regeneration Upgrades
Health Regeneration upgrades are incredibly valuable for Iron Citron because of his naturally high health pool and tendency to take sustained damage while contesting objectives. Variants like Health Regeneration and Health Regeneration Delay Reduction allow you to recover from fights more quickly without relying on Sunflower healing, improving your sustain during extended objective contests.
I typically run at least one health regeneration upgrade in almost every build because the value is too significant to ignore. Being able to duck behind cover for a few seconds and return to full health means you can apply constant pressure rather than being forced back to spawn or hunting for healing after every engagement. The regeneration upgrade effectively multiplies your health pool over the course of a match, as each time you regenerate represents another 150-200 HP worth of value.
Health Regeneration Delay Reduction is particularly synergistic with Iron Citron’s playstyle because you’re constantly trading damage and ducking behind cover. The faster your regeneration kicks in, the less time you need to spend hiding and the more time you can spend contesting objectives. This upgrade turns brief moments behind cover into full health resets, dramatically improving your sustain in extended holds.
The combination of both health regeneration upgrades creates a sustain loop where you’re nearly unkillable if you have access to good cover and manage your health thresholds properly. I can hold objectives almost indefinitely with double regeneration upgrades, peeking to deal damage, retreating to heal, and repeating this cycle faster than zombies can organize pushes to dislodge me.
Mobility and Speed Upgrades
Speed Upgrade is somewhat controversial for Iron Citron because while movement speed is clearly one of his weaknesses, the percentage increase provided by speed upgrades doesn’t fully overcome his natural sluggishness. A 10% speed boost still leaves you slower than most other characters, and you’re sacrificing other potentially more valuable upgrade slots to achieve that modest improvement.
That said, I do run Speed Upgrade in my aggressive pushing builds because every bit of mobility helps when you’re trying to close distance or escape from bad situations. The speed bonus becomes most noticeable in ball form, where it stacks with your already enhanced rolling speed. This allows you to rotate between objectives slightly faster and makes ball form escapes marginally more reliable against pursuing zombies.
The decision of whether to run speed upgrade comes down to your playstyle preference. If you play Iron Citron as a mobile rotator who moves between objectives, speed upgrade provides consistent value. If you play him as a static anchor who holds single positions, that upgrade slot is better spent on regeneration or damage stats. I adjust my build based on the map and game mode, using speed on larger maps where rotation distance matters and skipping it on compact maps where positioning matters more than mobility.
Damage Enhancement Options
Damage Upgrade increases your primary weapon damage output, which sounds attractive for Iron Citron’s chunky projectiles. However, the damage increase is percentage-based, meaning you’re only adding a few extra damage points per shot. Whether this upgrade is worth it depends on whether those extra damage points reduce the number of shots needed to kill specific zombie variants.
If a damage upgrade lets you kill standard Scientists in three hits instead of four, that’s incredibly valuable because you’re reducing time-to-kill by 25%. If it just slightly reduces TTK without changing shot-count breakpoints, it’s less impactful. You need to do the math for the specific matchups you struggle with most. I’ve found damage upgrade most valuable against tankier zombie classes like All-Star where the extra damage per shot accumulates into meaningful time-to-kill reductions.
The damage increase also affects your splash damage, meaning you’re getting more value against clustered targets. When fighting groups, the damage upgrade effectively multiplies across multiple enemies simultaneously, increasing its value compared to single-target scenarios. This makes damage upgrade more attractive in modes like Garden & Graveyards where you frequently engage groups rather than Team Vanquish where fights are often 1v1.
Ammunition and Reload Upgrades
Ammo Upgrade extends your magazine size, which partially addresses one of Iron Citron’s weaknesses. Having 25 rounds instead of 20 means you can engage longer before reloading and potentially secure an extra kill per magazine. This upgrade becomes particularly valuable in game modes where you’re frequently fighting multiple targets in sequence, as running out of ammo mid-fight is one of the most frustrating ways to die.
I include Ammo Upgrade in my defensive builds where I expect to hold positions against multiple waves of attackers. The extra ammunition means I can fight off 5-6 zombies without reloading, whereas with base magazine size I might only handle 4 before being forced to reload and becoming vulnerable. That one extra kill before reloading often makes the difference between holding an objective and losing it.
Reload Upgrade reduces your reload time, which is extremely valuable given Iron Citron’s painfully slow base reload speed. Shaving even half a second off that 2.5-second reload animation can be the difference between finishing an enemy and dying during the vulnerable reload window. This upgrade becomes most impactful when you’re playing aggressively and frequently engaging in extended firefights where you’re reloading multiple times.
The reload upgrade pairs particularly well with Ammo Upgrade, as the combination allows you to maintain high uptime on your weapon. With both upgrades, you have a larger magazine that empties less frequently and reloads faster when you do need to reload. This synergy creates a noticeable improvement in sustained damage output over the course of matches. I run this combination when I expect to be in constant combat rather than having downtime between engagements.
Recommended Build Configurations
For my aggressive pushing build, I typically run: Speed Upgrade, Reload Upgrade, and Health Regeneration. This combination maximizes my ability to close distance, maintain sustained damage output, and recover between engagements. The goal with this build is to constantly pressure objectives and create space for my team by forcing zombies to deal with my presence.
I sacrifice some raw damage potential for improved survivability and mobility, which I find more valuable when playing the frontline tank role. This build works best on larger maps where rotation distance matters and in modes where you’re expected to push between multiple objectives rather than holding a single position.
My defensive anchor build uses: Health Regeneration, Health Regeneration Delay Reduction, and Ammo Upgrade. This setup turns me into an immovable object on objectives, with enhanced sustain and the ammunition reserves to fight off multiple attackers without reloading. This build excels in modes like Garden & Graveyards where you’re literally standing on an objective defending it against waves of zombies.
The double health regeneration upgrades mean I can peek out, trade damage, retreat behind cover to heal, and repeat this cycle almost indefinitely. The ammo upgrade ensures I can fight off entire waves without being forced to reload at critical moments. I use this build when I know I’ll be holding specific positions for extended durations rather than moving around the map.
For players who prefer a more damage-focused approach, consider: Damage Upgrade, Reload Upgrade, and Ammo Upgrade. This build prioritizes raw killing power over survivability, betting that you can eliminate threats quickly enough that you won’t need enhanced regeneration. This approach works best when you have reliable Sunflower support on your team and can trust that you’ll receive healing rather than needing to self-sustain.
It’s riskier but can output genuinely impressive damage in coordinated team compositions. I run this build when playing with premade teams where I know I’ll have dedicated support, allowing me to focus purely on damage output without worrying about self-sustain. In solo queue where support is unreliable, I lean toward regeneration builds that allow me to operate independently.
Game Mode Strategies and Positioning
Iron Citron’s effectiveness varies dramatically depending on the game mode and map you’re playing. Understanding where and how to position yourself in different scenarios is crucial for maximizing your impact and avoiding the frustration of feeling ineffective with a character that can absolutely dominate when used correctly.
Garden & Graveyards Strategy
Garden & Graveyards is arguably Iron Citron’s strongest game mode because the objective-focused gameplay plays directly into his strengths. As a defender, you can plant yourself directly on the garden and become an immovable obstacle that zombies must deal with. Your massive health pool and area-denial capabilities mean you can hold contested gardens solo against multiple attackers, buying time for your team to respawn and reinforce your position.
I position myself centrally on the objective where I can see multiple approach angles, using cover to break line of sight when I need to regenerate health but never straying far from the garden itself. The goal is to make the garden itself a dangerous place for zombies to be, forcing them to either fight you or abandon the capture attempt. Your splash damage becomes devastating on enclosed gardens where zombies cluster together, and your health pool lets you survive long enough for teammates to arrive and help.
When attacking in Garden & Graveyards, Iron Citron becomes a devastating garden clearer once you actually reach the objective. The challenge is getting there, as your slow movement speed makes you vulnerable to defensive setups during the approach. I typically use ball form to close distance quickly, activating shield before crossing dangerous open areas, then transform directly on or near the garden and start pressuring defensive positions.
Your splash damage becomes incredibly valuable for clearing clustered defenders who are holding the garden. A single well-placed shot can damage multiple defending plants simultaneously, and your health pool allows you to contest the garden even when outnumbered. Don’t try to capture gardens alone unless absolutely necessary, wait for teammates to push with you and use your durability to draw fire while squishier plants deal damage.
Team Vanquish Approach
Team Vanquish rewards Iron Citron players who understand map control and positioning. You’re not a roaming assassin who gets solo kills across the map, you’re an anchor who controls key areas and forces zombies to either avoid that space or commit multiple resources to dislodging you. I identify high-traffic areas or important sightlines and establish myself there, making it extremely costly for zombies to pass through my zone of control.
When teammates are nearby, I push more aggressively, using my health pool to lead charges and create space for squishier allies. When isolated, I play more conservatively and focus on staying alive while applying pressure. The key to Team Vanquish is understanding that every death costs your team a point while every kill gains one. Iron Citron’s high survivability means you should typically have a positive kill-death ratio simply by playing smart and not taking unnecessary risks.
Focus on securing kills on damaged targets rather than chasing fresh full-health zombies across the map. Use your EMPeach to set up easy eliminations rather than wasting it on single targets you’re already beating. Never forget that staying alive and contesting space has value even when you’re not actively getting kills. If you’re controlling a key area and forcing zombies to take alternate routes, you’re providing value even if your elimination count isn’t impressive.
I pay attention to death locations and avoid returning to areas where I died unless circumstances have changed. If a particular corridor has a Deadbeard watching it who killed me, I don’t walk back into that same sightline expecting different results. Instead, I rotate to different areas or wait for teammates to help me clear that threat. Playing smart about avoiding repeated deaths in the same locations dramatically improves your overall K/D ratio.
Gnome Bomb Tactics
Gnome Bomb presents interesting challenges for Iron Citron because the mode requires both defensive anchoring (when protecting your bomb site) and mobility (when attacking enemy sites or retrieving the gnome). When defending, Iron Citron is phenomenal, as you can position yourself directly on the bomb site and make it extremely difficult for zombies to plant.
Your splash damage clears clustered attackers attempting to plant, and your health pool lets you survive long enough for teammates to respond to threats. I position myself where I can see both common plant approaches and the bomb site itself, allowing me to intercept carriers before they reach the plant location. EMPeach is particularly valuable for stunning carriers and forcing them to drop the gnome before reaching the site.
When attacking or playing for the gnome, Iron Citron’s mobility limitations become more apparent. You’re slower than most characters when carrying the gnome, making you an easy target for focused fire. I typically let faster teammates grab the gnome while I provide escort and area denial, clearing paths and stunning threats with EMPeach.
If you do grab the gnome, use ball form immediately and try to roll directly to the bomb site rather than walking. The speed bonus helps offset some of your vulnerability, though you’re still slower than most other gnome carriers. Activate your ball shield before crossing dangerous areas and accept that you’ll take some damage rather than trying to avoid all damage and getting caught without protection.
Mixed Mode Adaptability
Mixed Mode maps with varying objectives require adaptable positioning throughout the match. On payload sections, Iron Citron can either push the cart forward relentlessly as an attacker or block the cart’s progress as a defender, using your body to literally occupy the space around the objective. Your health pool allows you to contest payloads even against multiple zombies, and your splash damage punishes zombies who cluster near the cart.
On king-of-the-hill sections, you’re arguably the best plant for contesting the hill itself, as your combination of health and damage makes you incredibly difficult to remove from circular capture points. I position myself centrally in the capture zone and force zombies to either avoid the hill entirely or commit multiple resources to killing me. Even if they succeed in eliminating you, the time they spent doing so allowed your team to score points and potentially swing the match.
The universal principle across all modes is understanding that Iron Citron controls space rather than hunting kills. You’re not trying to have the highest elimination count on your team, you’re trying to control the areas that matter most for winning the match. Sometimes that means standing on an objective and forcing zombies to deal with you.
Sometimes it means blocking a crucial chokepoint so zombies can’t reach your teammates. Sometimes it means being the first plant onto a contested area to establish presence before zombies can set up defensive positions. Focus on winning games rather than padding stats, and you’ll find your win rate improves dramatically even if your personal stats don’t always look impressive on paper.
Matchup Knowledge Against Zombie Classes
Understanding how Iron Citron matches up against different zombie classes is crucial for making smart decisions about when to engage, when to retreat, and when to request backup from teammates. Let’s break down the key matchups and discuss optimal strategies for each encounter.
Fighting Foot Soldiers
Foot Soldier is generally a favorable matchup for Iron Citron at close to medium range. Foot Soldiers rely on sustained fire to deal damage, and their relatively modest DPS means they struggle to burn through your 200 HP before you can land enough shots to eliminate them. The key is closing distance quickly using ball form and forcing the engagement into close range where your splash damage and higher per-shot damage give you the advantage.
Watch out for Foot Soldiers using Rocket Jump to gain high ground advantage, as shooting down at you makes them harder to hit while making you an easier target. When I see a Foot Soldier rocket jumping to high ground, I either reposition to break their sightline or use EMPeach if they’re close enough to stun mid-air. Don’t sit in the open trading shots with elevated Foot Soldiers, you’ll lose that trade.
EMPeach is extremely effective against Foot Soldiers, as the stun duration gives you time to land multiple free shots. I typically stun Foot Soldiers when they’re in close-medium range where I can guarantee landing follow-up damage. At longer ranges, even stunned Foot Soldiers might be too far away for me to capitalize on the stun window effectively.
Against Super Commando and General Supremo variants who deal more damage at range, I’m more cautious about taking extended trades. These variants can chunk your health faster than standard Foot Soldiers, making it important to use cover effectively and land your shots efficiently. I play more patiently against these variants, taking shots when I have advantages and retreating when they have better positioning.
Battling Engineers
Engineer matchups depend heavily on range and positioning. At close range, Engineers can absolutely shred your health with their rapid-fire weapons, particularly variants like Mechanic or Electrician. You want to maintain medium range against Engineers where your projectiles are still accurate but their weapons suffer from damage falloff.
If an Engineer gets right in your face, consider using ball form to create distance rather than trying to out-DPS them in a close-range brawl. Your slower fire rate and projectile-based weapon put you at a disadvantage in point-blank spray-and-pray fights. I’ll often ball form backward while taking a few shots, creating separation before transforming and engaging at my preferred range.
Be particularly careful around teleporters, as Engineers defending their teleporter can often call for reinforcements faster than you can kill them. If I encounter an Engineer near a teleporter, I prioritize destroying the teleporter over killing the Engineer unless I can do both quickly. Use EMPeach to interrupt teleporter deployment and force Engineers to waste time redeploying.
Against Roadie Z and Plumber variants with shotgun-style weapons, maintaining distance becomes even more critical. These Engineers want to get close and delete you with high burst damage. I use my splash damage to hit them around corners and cover, preventing them from safely closing the gap. If they do get close, EMPeach gives me the window needed to create separation or finish them before they can use their close-range advantage.
Countering Scientists
Scientist is one of Iron Citron’s most challenging matchups due to their high close-range burst damage and superior mobility. Scientists can warp around your shots, deal massive damage in seconds with their shotgun-style weapons, and warp away before you can punish them. The key to beating Scientists is predicting their warp patterns and landing shots where they’ll appear rather than where they currently are.
Never chase Scientists into enclosed spaces where they can use their mobility advantage against you. Instead, try to catch them in open areas where warping doesn’t provide significant defensive value. When a Scientist warps, I track the direction and distance of their warp and fire a projectile at their likely destination point. This predictive shooting catches Scientists who think they’ve escaped danger.
EMPeach is your best defensive tool against aggressive Scientists, stunning them mid-warp and allowing you to land guaranteed damage. I save EMPeach for Scientists who are actively diving me rather than wasting it on Scientists who are just poking from range. The stun stops their aggressive play and often results in their death as they can’t warp away from your follow-up shots.
Against Marine Biologist and Archaeologist who have delayed damage mechanics, I’m especially careful about taking unnecessary damage. These Scientists can warp in, tag you with their attack, and warp away before you can properly retaliate, leaving you with damage-over-time effects. I use cover aggressively against these variants, peeking to shoot them and immediately ducking behind cover to minimize their damage windows.
Handling All-Stars
All-Star is a skill matchup that can go either way depending on player skill and positioning. All-Stars have comparable health pools to Iron Citron and can deal consistent damage at medium range with their football cannons. The key advantage you have is splash damage, which allows you to damage All-Stars even when they’re using Sprint Tackle or moving evasively.
Try to bait out their Sprint Tackle ability, then punish them with shots while it’s on cooldown. All-Stars become significantly less threatening without Sprint Tackle available, as they lose their primary engagement and escape tool. I’ll often fire shots deliberately to bait the Sprint Tackle, dodging it with ball form or lateral movement, then capitalizing on the cooldown window.
EMPeach completely shuts down Sprint Tackle if you time it correctly, stunning them mid-charge and leaving them vulnerable in melee range where your splash damage is most effective. This interrupt is one of the most satisfying EMPeach uses because it completely negates their offensive pressure and turns their aggressive play into a death sentence.
At close range, both characters can kill each other quickly, so the fight often comes down to who lands their shots more consistently and who manages their cooldowns better. I focus on landing direct hits rather than relying on splash damage, as the fight will be decided by total damage output over a short window. Against Wrestling Star and other variants with different damage profiles, I adjust my play based on their specific threat ranges but maintain the same general approach of baiting abilities and capitalizing on cooldowns.
Dealing with Super Brainz
Super Brainz is genuinely one of Iron Citron’s most difficult matchups when played by a skilled zombie player. Super Brainz’s mobility, beam attack, and ability to close distance quickly make him a nightmare to deal with. Your best defense is maintaining distance and landing shots as he approaches, but good Super Brainz players will use cover to minimize the damage they take during the approach.
Once Super Brainz reaches melee range, you’re in serious trouble, as his melee combo can deal massive damage extremely quickly. Your slower fire rate means you can’t out-DPS him in close-quarters brawls, and his mobility makes creating distance difficult. I try to never let Super Brainz get into melee range in the first place, using ball form to maintain spacing and firing projectiles while backpedaling.
EMPeach is absolutely critical in this matchup, use it as soon as Super Brainz commits to diving you, giving yourself time to create distance or allowing teammates to help peel him off you. The stun stops his advance and prevents him from using his abilities, often creating enough time for you to finish him or escape to safety. Without EMPeach available, I’m much more cautious about fighting Super Brainz and will often retreat rather than taking an unfavorable fight.
Against Toxic Brainz and Electro Brainz with different damage types, the core strategy remains the same: maintain distance, land shots during approach, and use EMPeach when they commit. These variants have different threat profiles (Toxic dealing damage over time, Electro chaining damage to nearby allies), but the fundamental approach of preventing close-range engagements applies universally to the Super Brainz class.
Avoiding Deadbeards
Captain Deadbeard is primarily a long-range threat that you’ll struggle to effectively counter. His sniper shots can chunk your health from distances where your projectiles are ineffective due to travel time and drop. Don’t try to duel Deadbeards at long range, you’ll lose. Instead, use ball form to close distance while utilizing cover to break line of sight.
If you can get close to a Deadbeard, they’re extremely vulnerable, as their close-range capabilities are limited and your splash damage makes them easy to hit. Most Deadbeards panic when a tanky character gets in their face, as they’re used to fighting at range where they have advantages. I push Deadbeards aggressively once I’ve closed the gap, knowing they can’t effectively fight back at close range.
Watch out for Barrel Blast, which Deadbeards often use to escape when you’ve closed the gap. If possible, save EMPeach to interrupt their barrel deployment, preventing their escape and securing the kill. If they do successfully barrel blast away, don’t chase them across the map, you’ll just expose yourself to another long-range engagement where they have advantages. Instead, focus on controlling space and forcing them to come to you or abandon the area.
Against Captain Squawk and Captain Sharkbite with different weapon types, I adjust my aggression based on their close-range threat level, but maintain the same general approach of closing distance through ball form and using cover to minimize the damage I take during approach.
Fighting Imps and Mechs
Imp and Z-Mech presents two distinct phases. Against Imp out of mech, you have a massive advantage due to your superior health and damage output. Imps are fragile and die quickly to your shots, though their small size and high mobility make them annoying to hit consistently. Lead your shots and predict their movement patterns rather than shooting directly at them.
Imp’s Impkata ability makes them temporarily invulnerable, so don’t waste shots on spinning Imps. Wait for the ability to end, then resume firing. EMPeach can interrupt Impkata if you time it correctly, though often it’s better to save EMPeach for when Imp calls down their mech. When you see the mech call-in animation, you have a brief window to stun the Imp and delay the mech’s arrival.
When Imp calls down his Z-Mech, the matchup completely flips, as Z-Mech’s massive health pool, explosive damage, and missile abilities make him extremely dangerous. Don’t try to solo a Z-Mech unless you have significant health advantage or positional superiority. The mech’s missiles and explosive weapons will shred your health, and even if you win the fight, you’ll likely die to the next threat you encounter.
Instead, use ball form to escape and regroup with teammates who can help focus fire the mech down. Z-Mech has high health but takes increased damage when its critical point (the back of the mech) is exposed. If you must fight a Z-Mech, try to get behind it and shoot the critical spot, but generally retreating and regrouping is the smarter play.
Chomper Encounters
Chomper is usually a favorable matchup because Chompers struggle to actually chomp you when you’re aware of their presence. Your massive health pool means you can survive a Chomper’s goop and burrow combo if you react quickly enough, and your splash damage makes hitting burrowed Chompers relatively easy. The key is maintaining awareness and not letting Chompers sneak up on you, as a successful burrow from behind still results in an instant kill.
If you see a Chomper approaching, start backing up while firing, forcing them to close distance through your damage. Most Chompers will try to goop you to set up their burrow, so be ready to use ball form to escape the goop radius or EMPeach to stun them before they can burrow. A stunned Chomper is completely helpless and usually dies before the stun expires.
EMPeach stops burrowing Chompers cold, stunning them mid-animation and leaving them completely vulnerable above ground where they’re easy to kill. This interrupt is particularly satisfying because it completely negates their primary threat and turns their aggressive play into a death sentence. I always save EMPeach for Chomper burrows when I know Chompers are on the enemy team.
Against Count Chompula and other Chomper variants with different abilities, the core strategy remains the same: maintain awareness to prevent sneak attacks, use splash damage to hit them even when burrowed, and use EMPeach to interrupt their burrow attempts when they try to engage you directly.
Advanced Techniques and Pro Tips
After hundreds of hours mastering Iron Citron, I’ve discovered numerous advanced techniques that significantly improve your effectiveness. These aren’t immediately obvious mechanics, but rather optimizations and strategies that good players develop through experience and experimentation.
Mastering Projectile Leading
Projectile leading at range requires understanding not just horizontal movement prediction but also vertical prediction. When zombies jump, they follow a predictable arc, and you can land shots by aiming at the apex of their jump rather than shooting where they currently are. Similarly, zombies falling from heights follow consistent trajectories that you can predict and shoot into.
Practice tracking jumping targets in the practice range or against bots until you develop muscle memory for these prediction shots. The difference between a player who hits 40% of their shots at medium range versus 70% is enormous in terms of actual impact. I spend time in custom games specifically practicing against jumping AI opponents to build this predictive aim skill.
For zombies moving laterally, the lead distance varies based on their speed and your distance to them. Standard walking zombies require about half a character-width lead at medium range, while sprinting zombies or those using movement abilities require a full character-width or more. Learning these lead distances for common scenarios makes them automatic reactions during actual matches.
Reload Canceling Tactics
Reload canceling with ball form is an advanced technique that can save your life in clutch situations. If you start reloading but suddenly need to escape, transforming into ball form immediately cancels the reload animation and allows you to roll away. While this means you don’t actually reload your weapon, it’s better than dying during that slow reload animation.
Advanced players track their ammo count and make split-second decisions about whether completing the reload is worth the vulnerability or whether escaping immediately is more important. If I’m at 0 rounds and start reloading but suddenly see three zombies rushing me, I’ll cancel the reload with ball form and escape rather than stubbornly trying to complete the reload and dying mid-animation.
This technique also works in reverse, I can start a reload to bait zombies into pushing me, then cancel it with ball form to escape their attempted punish. Some zombies will see you reloading and aggressively push thinking you’re vulnerable, so canceling the reload and escaping or using EMPeach to counter their aggression can turn their attempted punish into your opportunity.
Exploiting Splash Damage Angles
Splash damage angles can be exploited to damage enemies around corners or behind partial cover. If you can see any part of a zombie’s body, you can shoot the wall or ground near them and catch them in the splash radius. This is particularly effective against enemies peeking from behind cover, as they often feel safe when only a small portion of their body is exposed.
By shooting the exposed cover they’re using rather than their body directly, you can damage them without having a direct line of sight to their hitbox. I’ve forced countless zombies to abandon strong defensive positions by consistently landing splash damage on them even when they think they’re safely behind cover.
This technique also works on objectives with physical structures. If zombies are hiding behind the garden statue or payload cart, I shoot the object itself to create splash damage that hits them on the other side. They often don’t realize they’re taking damage from splash rather than direct hits, and continue holding positions that are actually quite punishable.
Strategic EMPeach Placement
EMPeach placement has more nuance than simply throwing it at enemies. Throwing EMPeach slightly behind approaching zombies rather than directly at them can be more effective because it accounts for their forward movement. By the time the stun activates, they’ll have moved into the radius, whereas throwing it directly at them might allow them to walk out of range before the stun triggers.
Similarly, placing EMPeach on commonly traveled paths just before zombies arrive can catch entire groups who didn’t see you deploy it. I’ll throw EMPeach around corners or into doorways where I know zombies are about to emerge, stunning them as they walk into the area without realizing the danger.
The visual indicator of EMPeach deploying gives zombies a brief window to try escaping its radius, so disguising your EMPeach deployment or placing it where zombies can’t see it until they’re already in range improves your stun consistency. I avoid throwing EMPeach in open areas where zombies can see it coming from far away and have time to retreat outside its radius.
Ball Form Momentum Exploitation
Ball form momentum can be used for unexpected aggression. Rolling toward enemies at full speed, transforming while still moving, and immediately firing creates a burst damage pattern that’s difficult for zombies to react to. The momentum from your roll carries into your walking speed briefly, allowing you to close more distance than zombies expect.
This technique works particularly well when pushing around corners or rushing onto objectives, as zombies often don’t expect Iron Citron to play that aggressively given his reputation as a slow defensive character. The surprise factor combined with the immediate damage output can secure kills before zombies properly react to your presence.
I use this aggressive ball form technique when I need to quickly contest an objective that zombies are capturing or when I want to close distance on ranged threats who think they’re safely outside my effective range. The momentum-enhanced approach compresses the distance faster than they expect, giving me advantageous positioning before they can adjust.
Health Threshold Management
Health threshold awareness is critical for survival. You need to internalize how much damage various zombie classes deal and know your health threshold for surviving their burst combos. For example, if you’re below 80 HP against a Scientist, they can potentially kill you in a single combo before you can react. Knowing these thresholds helps you make better decisions about when to retreat versus when you can stay in a fight.
Don’t wait until you’re at critical health to retreat, identify danger thresholds and start moving toward safety before you reach them. If I’m fighting an All-Star and drop below 100 HP, I start looking for retreat opportunities even if I’m winning the trade, because one Sprint Tackle or a few lucky shots could finish me quickly.
I also track which zombies are present in the current engagement and adjust my health thresholds based on their combined threat. If I’m fighting a Scientist and notice a Deadbeard has sightlines on me, I retreat at higher health than I would against the Scientist alone, because the combined damage from both sources is much more dangerous than either individually.
Objective Timing Optimization
Objective timing involves understanding not just where to be but when to be there. Arriving at an objective too early means you’re vulnerable and isolated, as zombies can focus you before teammates arrive to support. Arriving too late means zombies have already established positions and you’re pushing into prepared defenses, which is much harder than contesting neutral objectives.
The ideal timing is arriving just as the objective becomes available or just as your team is making a coordinated push. This requires map awareness and anticipation of game flow, but it dramatically improves your impact on matches. I watch the objective timer and start rotating before the objective becomes contestable, arriving right as it opens rather than after zombies have already begun setting up.
In modes with sequential objectives, I also predict which objective will be contested next based on current game flow and start rotating toward that position before it’s officially active. This proactive positioning means I’m already in a strong defensive position when the objective opens, rather than fighting for space against zombies who arrived first.
Advanced Cover Usage
Cover usage goes beyond simple hiding and peeking. Advanced players use cover to dictate engagement angles, forcing zombies to approach from directions where you have advantages. If you position yourself so that approaching zombies must cross open ground while you can shoot from behind cover, you’ve created a massive advantage before the fight even begins.
I look for positions where I can see multiple approach angles from behind partial cover, allowing me to peek and shoot different directions while always having a retreat path available. This positioning makes it extremely difficult for zombies to push me effectively, as they’re taking damage during their entire approach while I’m relatively protected.
Similarly, positioning near cover allows you to peek, shoot, retreat, regenerate, and repeat this cycle to steadily wear down zombie health without taking significant damage yourself. This cover cycling is how I hold objectives for extended durations, taking favorable trades and healing between engagements rather than trying to tank all damage with my health pool alone.
Common Mistakes to Avoid
Even experienced Iron Citron players fall into common traps that significantly reduce their effectiveness. Identifying and correcting these mistakes can immediately improve your performance and help you carry games more consistently.
Overextending Without Team Support
Overextending without support is probably the single most common mistake I see Iron Citron players make. Yes, you have 200 HP and can survive significant damage, but you’re not invincible. Pushing deep into zombie territory without teammates nearby means you’ll get focused by multiple zombies simultaneously and die regardless of your health pool.
Iron Citron is an anchor who controls space with team support, not a solo flanker who makes hero plays alone. Stay with your team and use your durability to lead pushes rather than making solo attempts at capturing objectives. Every time I’ve tried to be the hero and solo capture objectives, I’ve either died immediately or succeeded once and then got camped on my next spawn.
The temptation to push forward when you have a health advantage is strong, but resist it unless you have teammates nearby who can support your push. A better approach is using your health advantage to hold your current position more dominantly while your teammates respawn and rejoin, then pushing as a group when you have numerical advantage.
Fighting at Ineffective Ranges
Fighting at ineffective ranges wastes your potential and often gets you killed. Iron Citron is a close to medium range brawler, not a long-range sniper. Stop trying to shoot Deadbeards across the map or engage Foot Soldiers at ranges where your projectiles take three seconds to reach them and they have ample time to dodge.
Close the gap using ball form, force engagements at ranges where you have advantages, and disengage from fights where the range favors your opponent. I see too many Iron Citron players standing in open areas trading shots with zombies at ranges where they’re hitting maybe 30% of their shots and taking consistent damage in return.
If you find yourself fighting at range where you’re missing more than you’re hitting, stop shooting and reposition to a better range or disengage entirely. Every missed shot is wasted time and ammunition that could have been spent in favorable engagements where your hit rate would be much higher.
Wasting EMPeach on Low-Value Targets
Wasting EMPeach on low-value targets is another frequent error that significantly reduces your effectiveness. EMPeach has a 15-second cooldown and is your best crowd control and self-defense tool. Using it to stun a single low-health Imp or a lone Scientist who’s already retreating means you won’t have it available when three zombies push you simultaneously or when an All-Star sprint tackles your Sunflower.
Save EMPeach for situations where it provides significant value: stunning multiple zombies, shutting down high-priority targets, interrupting important abilities, or defending yourself when genuinely threatened. If you find yourself using EMPeach every time it’s off cooldown regardless of situation, you’re probably wasting it and leaving yourself vulnerable during important moments.
I evaluate each potential EMPeach usage by asking: will this stun create a meaningful advantage that I couldn’t achieve without it? If I’m already winning a 1v1 fight and can finish the enemy with normal shots, using EMPeach is wasteful. If I’m fighting 1v3 and need the stun to create space for escape or to secure at least one kill before dying, that’s valuable EMPeach usage.
Poor Reload Discipline
Forgetting to reload in safe moments leads to dying with an empty magazine during critical fights. Iron Citron’s slow reload means you cannot afford to start reloading mid-fight when enemies are actively shooting you. Develop the habit of reloading whenever you have a safe moment: after eliminating an enemy, when retreating behind cover, during lulls in combat.
Never enter a new fight with less than 10 rounds in your magazine if you can help it. Count your shots during engagements and anticipate when you’ll need to reload rather than firing until empty and then panic reloading in the middle of combat. That discipline has saved my life countless times and prevented situations where I almost secure a kill but die because I ran out of ammunition at the critical moment.
I’ve developed the habit of reloading almost automatically after every engagement, even if I only fired 5-10 rounds. This ensures I’m always entering fights with a full or nearly full magazine, giving me maximum flexibility to engage multiple targets or extended single-target fights without ammunition constraints.
Excessive Ball Form Usage
Staying in ball form too long seems counterintuitive since ball form is your mobility tool, but many players roll around objectives endlessly rather than transforming and applying damage. Ball form is for traversal and escape, not for extended combat. If you’re on an objective or in a fight, you should be in assault mode dealing damage with your primary weapon.
I’ve watched Iron Citron players roll in circles around zombies, taking damage and dealing minimal collision damage, when they could have transformed and eliminated those zombies in seconds with their primary weapon. The time spent rolling around could have been spent actually contesting the objective or securing kills, which is what wins matches.
The only time you should be in ball form during combat is when you’re actively escaping danger or repositioning to a better location. Once you reach your intended position, transform immediately and start shooting. Every second spent in ball form on an objective is a second you’re not applying meaningful pressure to enemies.
Ignoring Health Regeneration
Ignoring health regeneration timing means you’re fighting on lower health than necessary. You have natural health regeneration that kicks in after not taking damage for several seconds. When you duck behind cover, actually wait for your health to start regenerating before peeking again. Too many players peek every two seconds, constantly resetting their regeneration timer and never actually healing.
Discipline yourself to stay behind cover for the full duration needed to start regenerating, even if it feels boring or like you’re being passive. That patience keeps you healthy and effective throughout extended fights, whereas constantly peeking on low health eventually gets you killed by chip damage you could have avoided by healing properly.
I count to three or four while behind cover before peeking again, ensuring my regeneration has definitely started before exposing myself to damage again. This simple discipline dramatically improves my survivability and allows me to take many more favorable trades throughout matches.
Chasing Kills Into Bad Positions
Chasing kills into bad positions gets you traded even when you secure the elimination. If an enemy is retreating into their team’s area with low health, let them go unless you have a clear escape route or teammates supporting your push. Getting a kill but dying immediately afterward is a neutral trade at best and often worse if you’re giving up objective presence to secure that kill.
Focus on staying alive and controlling space rather than padding your kill count by trading yourself for weak targets. A living Iron Citron on the objective is worth more than an extra elimination followed by a 10-second death timer and spawn walk. I’ve learned to let kills go when pursuing them would put me in dangerous positions, trusting that controlling space and staying alive provides more value than individual eliminations.
The most frustrating version of this mistake is chasing a low-health zombie around a corner only to find three more zombies waiting on the other side. That one zombie was bait, intentionally drawing you into a bad position where the zombie team could focus fire you. Recognize when chases might be traps and resist the temptation to pursue every possible kill.
Maps Where Iron Citron Excels
Certain maps in Garden Warfare 2 particularly favor Iron Citron’s playstyle due to their objective layouts, chokepoint designs, and combat engagement ranges. Understanding which maps suit this character helps you choose when to deploy him for maximum impact.
Great White North
Great White North features multiple close-quarters objectives with limited approach angles, making it phenomenal for Iron Citron. The first garden has several tight doorways that zombies must push through, allowing you to post up and punish anyone who enters with splash damage. Your health pool lets you hold these doorways even against multiple attackers, and your splash damage becomes devastating in the confined spaces.
The second garden’s indoor spaces similarly favor your close-range power, with rooms and corridors that prevent zombies from engaging at the long ranges where you’re ineffective. I position myself in doorways and corridors connecting to the garden, forcing zombies to fight through me to reach the objective. The architecture provides excellent cover for managing health regeneration while maintaining objective presence.
The final garden’s layout is still compact enough that you can cover most important approach angles from a central position, and the mix of indoor and outdoor spaces gives you options for where to position based on zombie strategy. I have some of my highest win rates as Iron Citron on this map because the objective design plays directly into your strengths of close-range durability and area denial.
Seeds of Time
Seeds of Time provides excellent sightlines at medium range where Iron Citron can effectively engage while also offering plenty of cover for managing health regeneration. The time portal objectives create natural chokepoints where zombies must push through predictable paths, allowing you to pre-aim and land splash damage on clustered groups who are forced to approach through limited angles.
The futuristic sections have enough vertical variance to be interesting but not so much that you can’t effectively contest high-ground positions with your projectile arc. The mix of open areas and covered positions allows you to choose engagement ranges and disengage when zombies try to force unfavorable fights.
I particularly enjoy the garden that has the large time portal structure in the center, as positioning near this structure gives you cover while allowing you to control approaches from multiple directions. The structure’s geometry creates interesting splash damage opportunities where you can hit zombies around its edges even when they think they’re safely using it for cover.
Z-Tech Factory
Z-Tech Factory features industrial corridors and enclosed objectives that prevent zombies from easily avoiding your presence. The conveyor belt sections force linear combat that favors your tankiness, as zombies can’t easily flank around you and must push through your position directly or abandon the objective entirely.
The factory floor objectives provide enough cover to support your playstyle while having small enough spaces that enemies can’t easily avoid your splash damage. Multiple rooms and corridors create situations where zombies must fight you in enclosed spaces where your area damage is most effective, or take long circuitous routes that give your team time to reinforce.
The map’s overall design rewards characters who can hold positions rather than those who rely on extreme mobility, making it ideal for Iron Citron’s anchoring playstyle. I can establish control over key corridors and rooms, forcing zombies to either fight through me or abandon important areas of the map.
Zombopolis
Zombopolis creates several standout positions where Iron Citron can anchor effectively. The museum objectives have defined defensive positions with good cover and limited zombie approach angles, allowing you to set up in positions where you can see attackers approaching while having cover available for health regeneration.
The apartment complex sections feature enough elevation changes to be tactically interesting while still keeping most combat at ranges where you’re effective. Staircases and hallways create natural chokepoints where your splash damage catches multiple zombies simultaneously, and the building interiors provide cover for managing health while maintaining objective presence.
The final objectives typically devolve into close-range brawls where your health pool and splash damage shine, as the confined urban environments force combat into the ranges where Iron Citron excels. I position myself in building entrances and key corridors, controlling access to objectives and forcing zombies to fight through me to reach their goals.
Maps to Avoid
Maps I avoid playing Iron Citron on include those with extreme verticality or extremely long sightlines that favor ranged combat over close-range brawling. Moon Base Z is probably my least favorite Iron Citron map because the low gravity mechanics and vertical mobility options allow zombies to easily get above you or avoid your relatively slow projectiles through aerial movement.
The reduced gravity makes projectile leading much more difficult as zombies can spend extended time airborne with unpredictable movement patterns. The open lunar surface areas provide long sightlines where Deadbeards and Foot Soldiers can engage you from ranges where you’re completely ineffective. I typically switch to different characters or Citron variants on Moon Base Z rather than struggling with Iron Citron.
Frontline Flats is similarly challenging due to its wide-open spaces and long sightlines that favor ranged characters over close-range brawlers. The open desert environment provides limited cover for managing health regeneration, and the long distances between objectives mean your slow base movement speed becomes a significant liability. Zombies can engage you from distances where your projectile travel time gives them ample opportunity to dodge.
Synergies With Plant Teammates
Iron Citron doesn’t exist in a vacuum, and understanding which plant teammates complement your playstyle can dramatically improve your team’s overall effectiveness. Building compositions that leverage Iron Citron’s strengths while covering his weaknesses is a key part of advanced team play.
Sunflower Support
Sunflower is obviously Iron Citron’s best friend because consistent healing allows you to leverage your massive health pool repeatedly rather than being forced back to spawn after taking damage. A good Sunflower who sticks near you and keeps you healthy transforms Iron Citron from a character who can contest objectives briefly to one who can hold them indefinitely.
I always appreciate when Sunflowers recognize that healing the frontline tank is often more valuable than healing backline snipers who are taking minimal damage. When I have a Sunflower actively healing me, I play much more aggressively, taking trades I would normally avoid because I know I can be healed back up rather than needing to manage health through regeneration.
If you’re playing with friends, having a dedicated Sunflower pocket you is probably the strongest two-player combination in the game. The Sunflower can focus entirely on keeping you healthy while you focus entirely on controlling space and securing kills, creating a symbiotic relationship where both players can specialize in their role without worrying about aspects the other player handles.
Cactus Area Denial
Cactus provides long-range damage and area denial that complements Iron Citron’s close to medium range focus. While you’re controlling the objective itself, Cactus can punish zombies trying to approach from distance and provide covering fire when you need to retreat. The combination of your tanking with Cactus’s damage creates a strong defensive core that’s difficult for zombies to break through.
Cactus drones can also provide additional area denial and crowd control that helps protect you from flanking attempts. When I’m holding an objective and notice a Cactus setting up in a supportive position, I feel much more confident holding aggressive positions because I know I have backup fire support if zombies try to overwhelm me.
The Cactus player benefits from having you draw attention and absorb damage while they deal damage from relative safety, and you benefit from having someone watching your flanks and providing damage on targets outside your effective range. This mutual support creates a defensive setup that requires coordinated zombie efforts to break.
Chomper Flanking Pressure
Chomper might seem redundant with Iron Citron since both are close-range specialists, but they actually complement each other well when played properly. While you’re drawing attention and taking fire on the objective, Chompers can flank around and eliminate isolated zombies or punish enemies who are focused on shooting you.
The pressure from two different angles forces zombies to divide their attention and creates opportunities for both characters to succeed. If zombies focus on you, the Chomper can get free kills on distracted targets. If zombies watch for the Chomper, you can advance more aggressively and establish better positions. Either way, the zombie team struggles to properly address both threats simultaneously.
Just make sure you’re not both trying to hold the exact same position, as that wastes Chomper’s mobility advantage and clusters your team making you vulnerable to explosive damage and area denial abilities. I communicate with Chomper players to coordinate our positioning so we’re creating crossfire situations rather than standing shoulder to shoulder.
Kernel Corn Mobility
Kernel Corn provides the mobile damage dealing that Iron Citron lacks. While you hold positions and anchor objectives, Kernel Corn can rotate quickly to threatened areas and provide burst damage against priority targets. The combination of your durability with Corn’s mobility and damage creates a balanced team core that can both hold ground and respond to threats across the map.
Kernel Corn can also help you secure kills on enemies who try to escape with low health, as his rapid-fire damage excels at finishing fleeing targets that might escape your slower projectiles. When I damage zombies who then retreat, having a Kernel Corn nearby often means those zombies die before reaching safety, whereas if I were alone they might escape and heal up.
The mobility difference also allows Kernel Corn to bait zombies into your area of control, leading pursuing zombies into your effective range where you can punish them. This baiting tactic creates opportunities for you to catch zombies who are focused on chasing your mobile teammate rather than watching for your presence.
Peashooter Burst Damage
Peashooter variants, particularly Agent Pea or Electro Pea, can provide high burst damage that compensates for your relatively modest DPS. When you stun enemies with EMPeach, skilled Peashooter players can eliminate those targets almost instantly with headshots or charged shots. The combination of your crowd control with their damage creates a deadly synergy that quickly eliminates threats before they can recover from the stun.
Even without EMPeach coordination, having Peashooters focusing the same targets you’re shooting creates combined fire that eliminates zombies much faster than either of you could alone. I try to call out targets I’m shooting at so Peashooter players know where to focus their damage, creating informal focus fire that dramatically improves our team’s efficiency.
Peashooters also benefit from having you draw aggro, as zombies focused on shooting the tanky Iron Citron often don’t notice the Peashooter dealing significant damage from another angle. This allows Peashooters to operate more freely than they could if they were the primary target, improving their survival and overall damage output.
Less Synergistic Compositions
Plants I have less synergy with include other immobile defensive characters like additional Citrons or certain Sunflower variants that also want to hold static positions. Having multiple slow, defensive characters often means your team lacks the mobility to respond to threats across the map or the burst damage to quickly eliminate priority targets before they can retreat.
While these compositions can work on certain maps or objectives where you’re literally defending a single position against waves of attackers, they’re generally less flexible and more vulnerable to coordinated zombie pushes that exploit your team’s lack of mobility. I prefer balanced compositions that combine my anchoring with mobile damage dealers and support that can adapt to changing battlefield conditions.
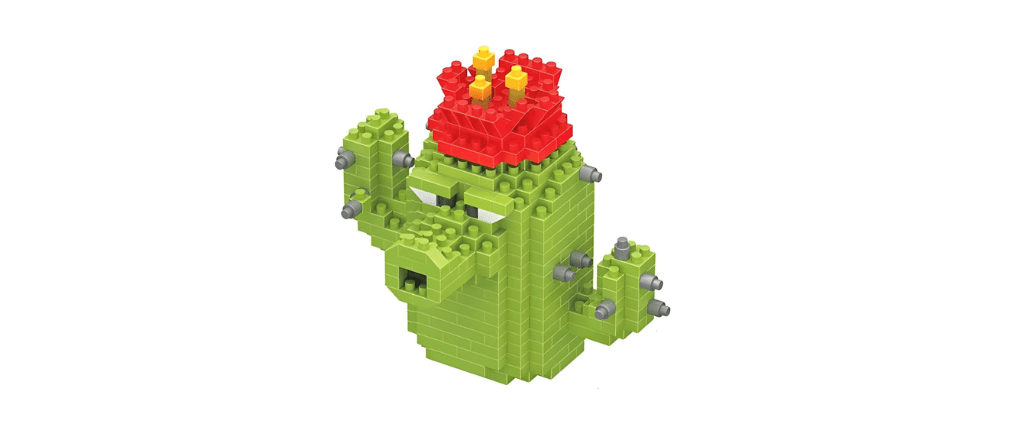
Skill Progression and Practice Tips
Improving with Iron Citron requires focused practice on specific skills rather than just mindlessly playing matches. Here’s how to deliberately practice the mechanics that separate good Iron Citron players from great ones.
Projectile Leading Drills
Projectile leading drills should be practiced in the practice range or custom games against moving bot targets. Set up bots to move predictably across your screen and practice leading your shots to hit them consistently. Start at close range where the lead distance is minimal, then gradually increase distance until you’re hitting targets at medium range 70%+ of the time.
Track your accuracy statistics if possible and try to improve your hit percentage over time. Good Iron Citron players hit significantly more shots than average players, and this consistency in landing damage is what allows them to win duels and secure kills. I spend 10-15 minutes before play sessions just practicing projectile leading against AI to maintain my accuracy skills.
Practice both horizontal leading (targets moving perpendicular to you) and vertical prediction (targets jumping or falling). These require different mental calculations, and both are essential for consistent damage output in real matches. I find that horizontal leading improves faster than vertical prediction, so I dedicate extra practice time to shooting jumping and falling targets.
EMPeach Timing Exercises
EMPeach timing exercises can be practiced by intentionally baiting zombie abilities and practicing the reaction time needed to interrupt them. In custom games with friendly zombies or AI zombies, wait for Engineers to start building teleporters, then practice stunning them mid-animation. Let Scientists heal near you and practice interrupting their heal stations.
Work on stunning Super Brainz during their beam attack or sprint abilities, improving your recognition of animation windows and your reaction time for deploying EMPeach at the correct moment. These timing drills improve your game sense for when zombies are likely to use important abilities and help you develop muscle memory for the EMPeach activation.
I also practice predictive EMPeach placement by throwing EMPeach where I expect zombies to be rather than where they currently are, accounting for their movement speed and direction. This predictive usage becomes automatic with practice and dramatically improves my stun consistency in actual matches.
Positioning Practice
Positioning practice involves playing entire matches where you focus exclusively on positioning rather than kill count. Make it your goal to maintain optimal range for every engagement, always have cover available for retreating, and never die due to being out of position. You might get fewer kills during these practice sessions, but you’ll develop much better habits about where to be on the map and when to rotate between positions.
After each death during these practice sessions, analyze what positioning mistake led to your death. Were you too far forward without team support? Were you in the open without cover? Did you stay in a position after it became untenable? Identifying these positioning errors helps you avoid repeating them in future matches.
I record some of my gameplay and review it later specifically to analyze my positioning decisions, identifying moments where I should have rotated earlier or held positions longer. This analytical review accelerates my positional skill development much faster than just playing without deliberate reflection.
Health Management Drills
Health management drills require disciplining yourself to retreat at specific health thresholds rather than fighting to the death. Set yourself a rule during practice sessions: if you drop below 100 HP, you must retreat to cover and regenerate before re-engaging. This might feel cowardly initially, but it will teach you proper survival instincts and help you recognize when you’re in danger versus when you’re actually safe to continue fighting.
Track how many deaths you avoid by following this discipline compared to sessions where you fight until critical health. You’ll likely find that your death count drops significantly and your overall impact per life increases when you preserve your health pool rather than trading it away unnecessarily.
I gradually adjust my health thresholds as I improve, eventually learning to recognize danger based on enemy composition and positioning rather than relying on strict numerical thresholds. But starting with rigid rules helps build the foundational discipline needed for advanced health management.
Ball Form Route Planning
Ball form escape routes should be pre-planned on every map before you need them. Spend time in custom games identifying where you can roll to from every objective to reach safety quickly. Know which corners you can roll around to break line of sight, which routes take you to health pickups, and which paths lead back to allied positions.
When you need to escape during a real match, you’ll already know the optimal route rather than panicking and rolling in random directions. This preparation dramatically improves your escape success rate and allows you to focus on execution rather than decision-making during high-pressure moments.
I mark mental waypoints on each map that serve as checkpoints during escapes, ensuring I’m rolling toward safety rather than accidentally rolling toward danger. These waypoints become automatic reference points that guide my escapes without requiring conscious thought during the chaos of combat.
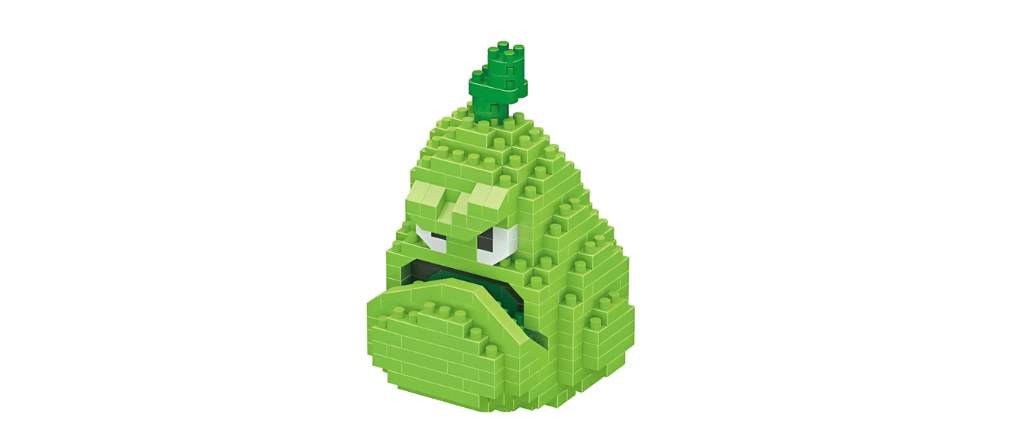
Final Thoughts and Mastery Mindset
Iron Citron is genuinely one of the most rewarding characters in Garden Warfare 2 to master because the skill ceiling is high and improvement is continuously noticeable. Every session you play, you can identify specific mechanical skills to improve, positioning decisions to refine, and matchup knowledge to deepen. This character rewards patience, discipline, and game sense in ways that more forgiving characters don’t, making each victory feel genuinely earned rather than lucky.
The most important mindset shift for improving with Iron Citron is understanding that you’re not trying to be the star player who tops the scoreboard in eliminations. You’re trying to be the anchor that enables your team to win by controlling critical space and forcing zombies to deal with your presence. Sometimes that means sitting on an objective for two minutes straight, taking constant damage, using all your abilities defensively, and only getting a single kill.
But if your presence on that objective forced five zombies to focus you instead of pushing other objectives or targeting your teammates, you’ve created enormous value even if the scoreboard doesn’t reflect it. Learning to recognize and appreciate this less visible impact is crucial for maintaining motivation during the inevitable matches where your stats don’t look impressive despite playing effectively.
Focus on fundamentals before trying to make flashy plays. Hit your shots consistently by practicing projectile leading until it becomes automatic. Manage your cooldowns properly by using EMPeach for maximum value rather than wasting it. Position yourself advantageously before fights start by anticipating objective timings and zombie movements. Retreat when you should retreat by respecting health thresholds and danger zones.
These basic skills will improve your performance far more than trying to execute advanced techniques you’re not ready for. I’ve seen countless Iron Citron players try to ball form into five zombies, stun them with EMPeach, and get a team wipe, when they should have been practicing landing basic shots at medium range and learning when to retreat from unfavorable fights.
Embrace the learning process and don’t get discouraged when you have bad matches. Iron Citron has legitimate weaknesses and on certain maps or against certain compositions, you’ll struggle no matter how skilled you are. That’s okay and expected. Use those difficult matches to identify what specifically countered you and think about how you might play differently in similar situations.
Maybe you needed to switch characters when your team composition wasn’t supporting your playstyle. Maybe you needed to play more defensively when the zombie team was coordinating to focus you. Maybe your positioning was poor for that specific map and you needed to establish yourself in different areas. Every match teaches you something if you’re willing to learn from both successes and failures.
Build good habits early rather than developing bad ones you’ll need to break later. Always count your ammo so you know when you need to reload. Always reload in safe moments rather than entering fights with partial magazines. Always check your flanks before committing to forward positions. Always communicate with your team about threats and coordinate pushes.
These habits feel tedious when you’re starting out, but they become automatic with practice and dramatically improve your consistency. Players with good habits perform reliably even when they’re having off days, while players with sloppy habits only perform well when everything goes perfectly, which is rare in the chaotic environment of Garden Warfare 2.
Most importantly, remember that Garden Warfare 2 is a game meant to be enjoyed. If you’re not having fun playing Iron Citron, try different variants or different characters entirely. There’s no shame in discovering that a character’s playstyle doesn’t resonate with you personally. Every player has different preferences and strengths, and finding characters that match your natural inclinations will make the game more enjoyable.
But if you do enjoy that feeling of being an immovable object on objectives, of forcing entire zombie teams to adjust their strategy around you, of surviving impossible situations through smart play and good positioning, then Iron Citron offers some of the most satisfying gameplay experiences in the entire game. The moment when you hold a contested garden alone against multiple attackers, buying just enough time for your team to respawn and reinforce, winning the match because of your individual tank play, is genuinely incredible.
Keep practicing and stay patient with your progress. Learn from both victories and defeats. Focus on improving specific skills rather than just grinding matches mindlessly. Build good habits early and maintain them consistently. Most importantly, have fun controlling the battlefield as Garden Warfare 2’s most durable citrus warrior.
The zombies won’t know what hit them when you’ve fully mastered this absolute unit of a character. Your team is counting on you to hold the line, and with the knowledge from this guide, you’re more than ready to do exactly that. Now get out there and show them why Iron Citron deserves respect as one of the most impactful objective-focused characters in the game, proving that sometimes the best offense is an iron-clad defense that refuses to break.
Sources and References
This comprehensive Iron Citron guide was created through extensive hands-on gameplay experience, combined with research from the Plants vs Zombies community. For additional information about Iron Citron and other character variants, you can visit the Plants vs Zombies Wiki, which provides detailed character statistics and ability descriptions. The official EA Plants vs Zombies Garden Warfare 2 website offers information about game modes and updates. Community discussions and strategy tips can be found on the PvZ Garden Warfare subreddit, where players share their experiences and techniques. For video tutorials and gameplay demonstrations, YouTube channels dedicated to Garden Warfare 2 provide visual guides that complement the strategies discussed in this article. These resources, combined with hundreds of hours of gameplay, formed the foundation for the tips and techniques shared throughout this guide.